Follow these steps to checkout and e-file.
2. Select the "File Now" button
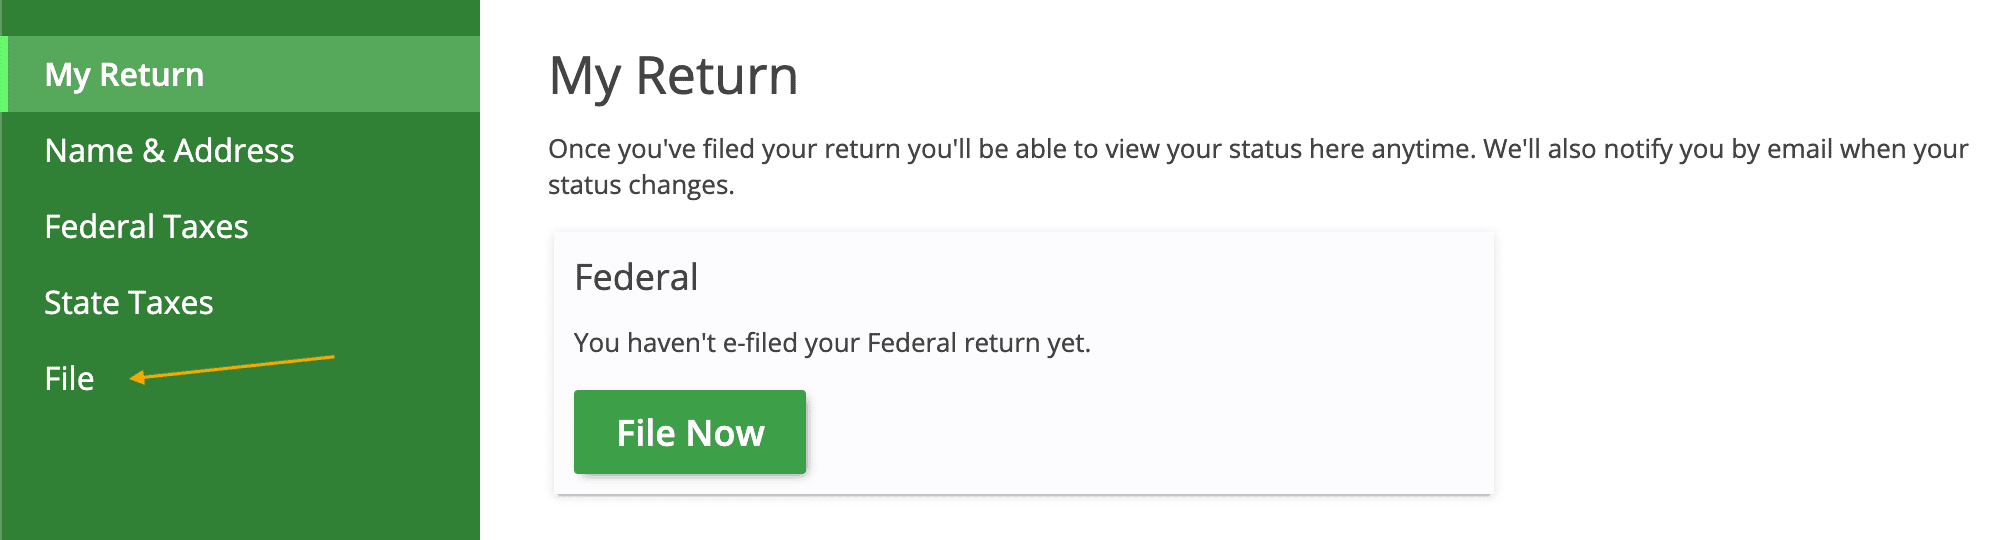
While in your eFile.com account, select "File" on the left side of your eFile.com account screen (or select the green "File Now" button).
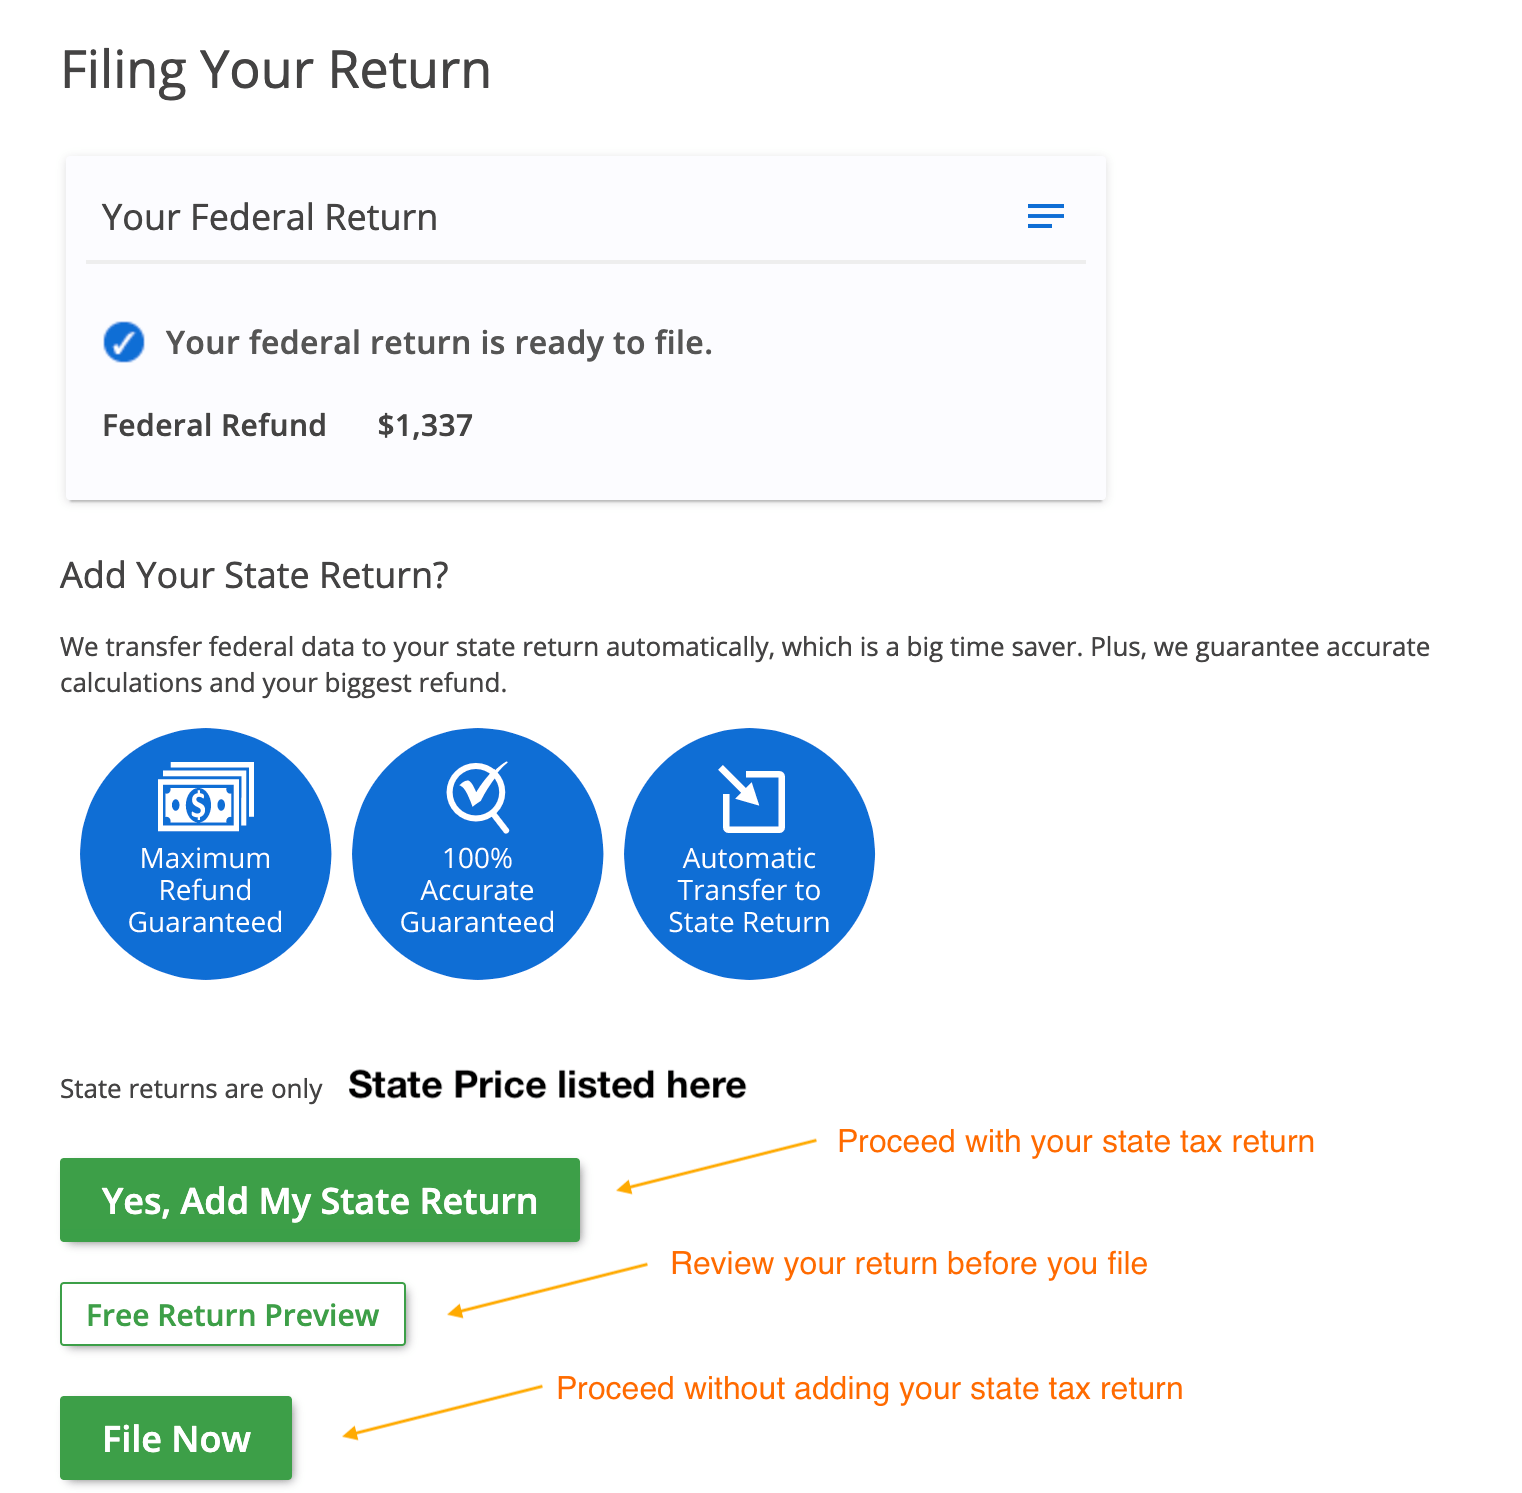
3. Preview and file your tax return
Select one of the buttons to proceed to the next screen or review your tax return before you file it.
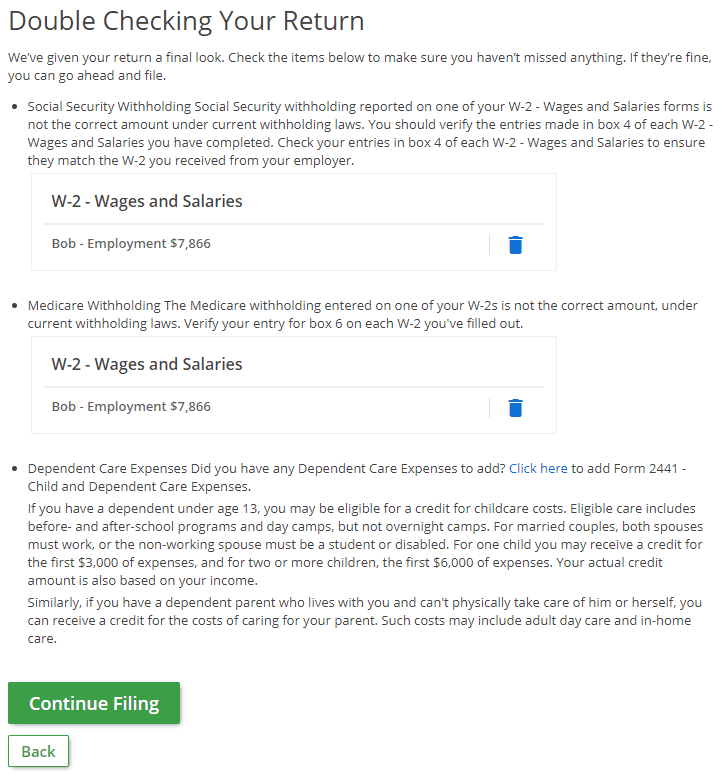
4. Double checking your return
After the system double checks your return, select the green "Continue Filing" button.
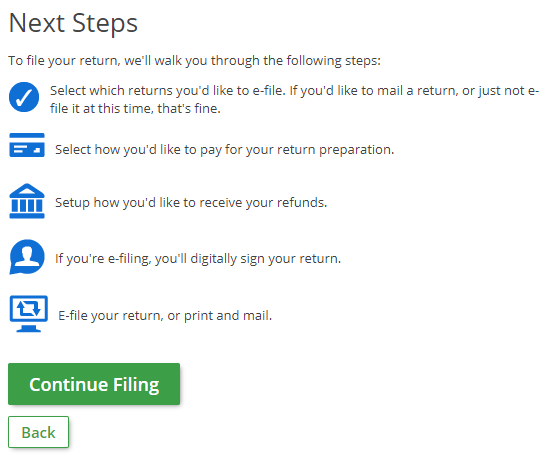
5. Select "Continue Filing" button
After reviewing the next steps, select "Continue Filing".
6. To e-file, select "Continue Filing"
Select the return (or returns) you want to e-file, then select "Continue Filing".
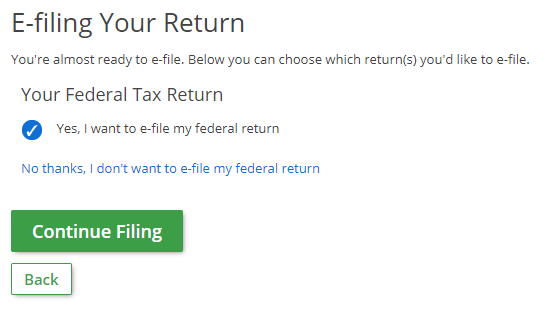
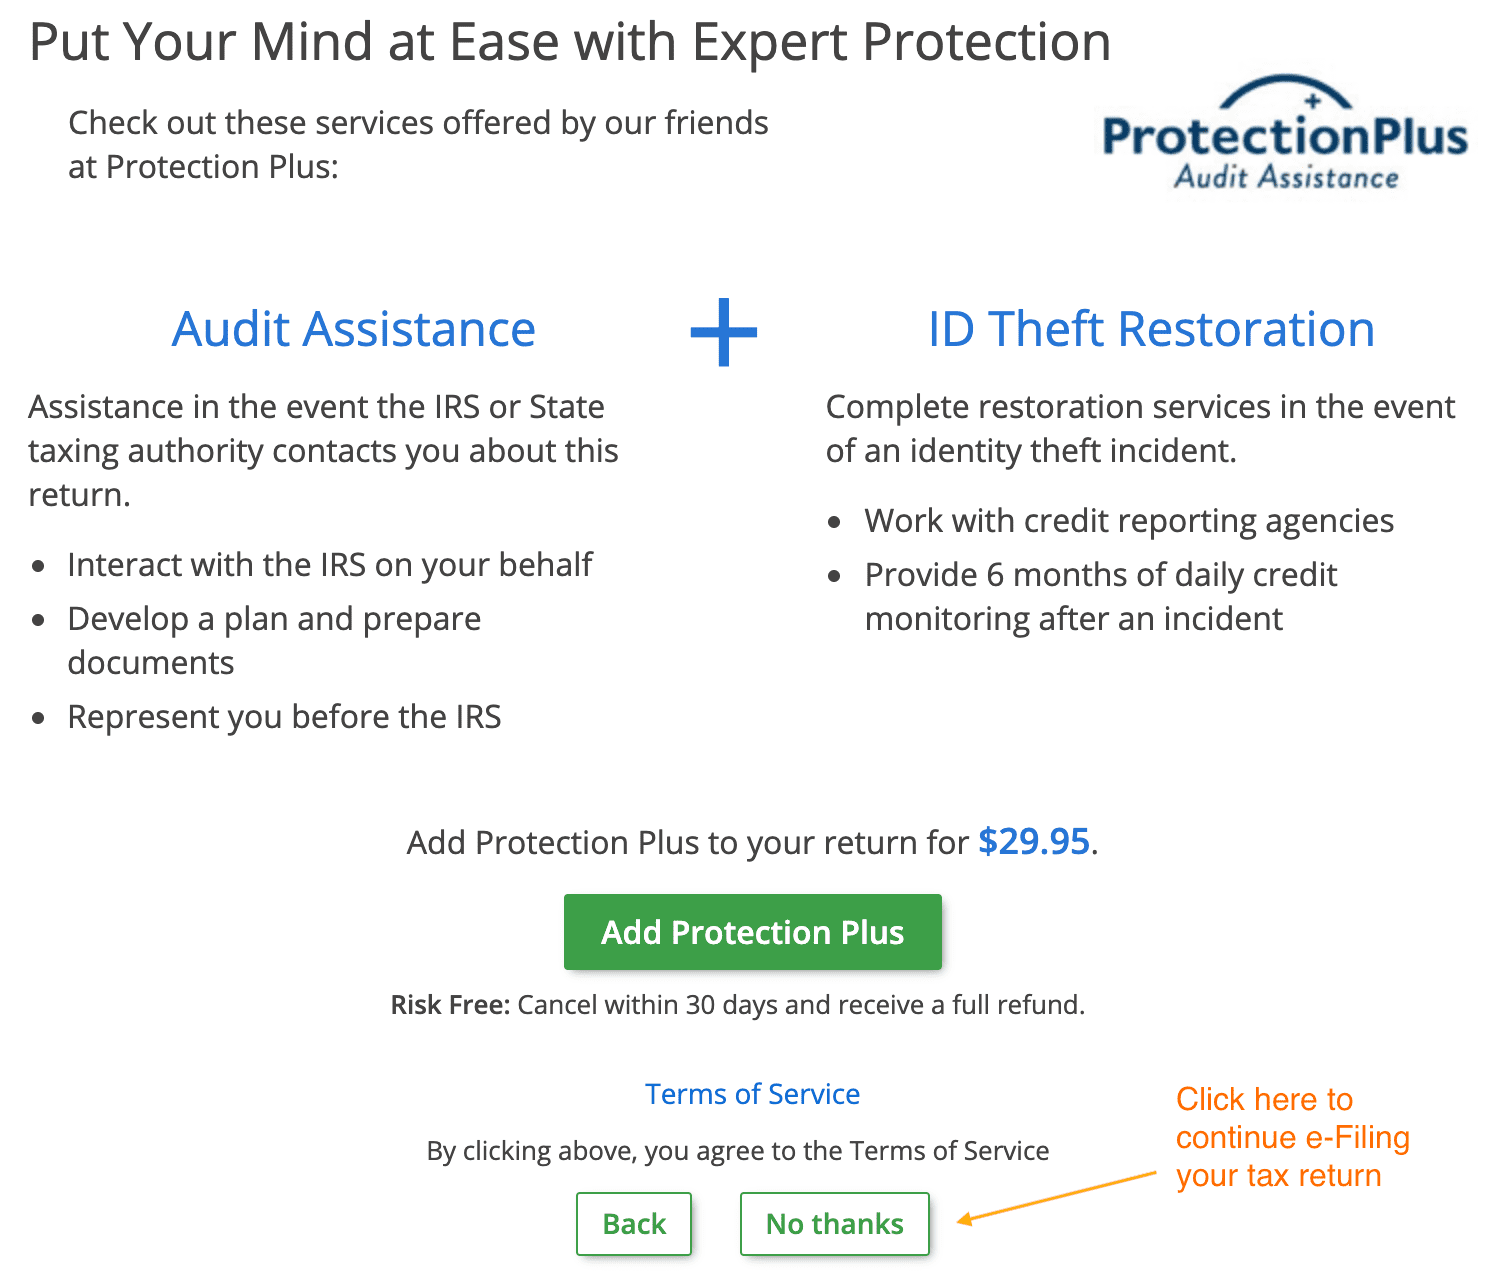
7. e-Filing your return
Select the "No thanks" button at the bottom to continue e-filing your return.
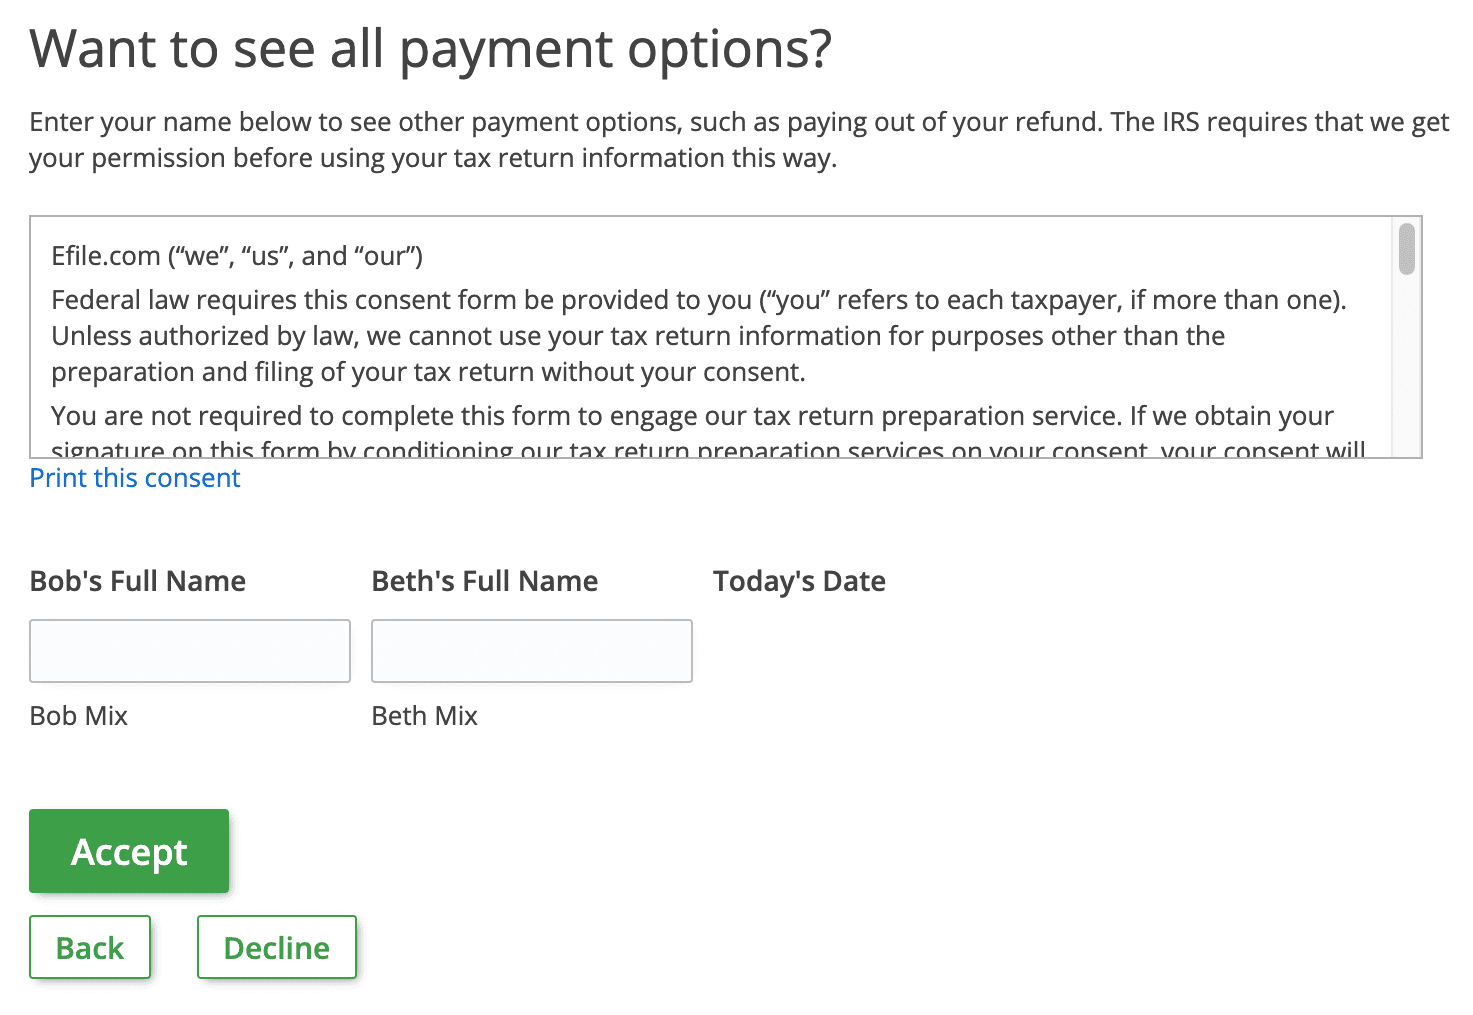
8. Select the "Accept" button
Consent to see all tax return preparation payment options by entering your name(s) in the box (or boxes if you have a spouse) shown and selecting the green "Accept" button.
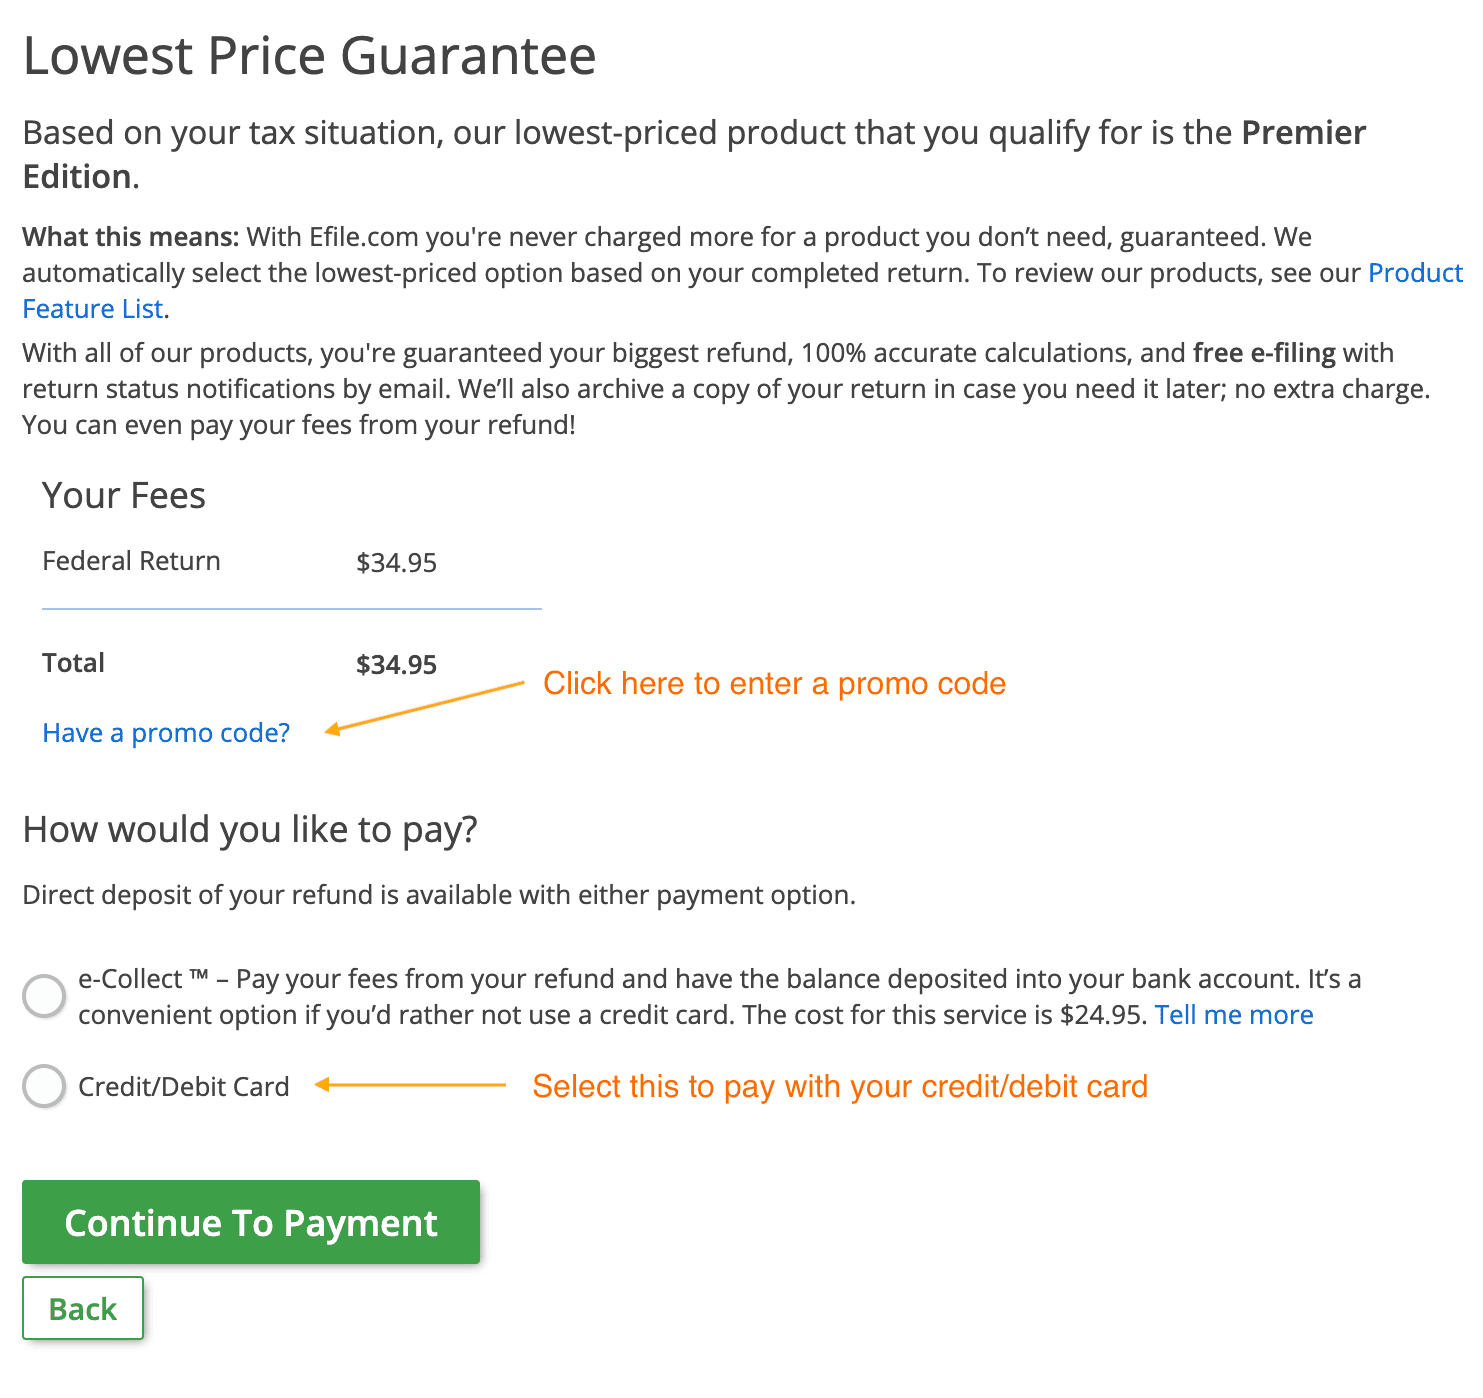
9.1. Payment method and promo code
Review your tax return preparation fee(s) and select your payment option. If you have a promo code, select the "Have a promo code?" link.
9.2. Enter the promo code
Enter the promo code in the white box, select the green "Apply Code" button, and select the green "Continue to Payment" button.

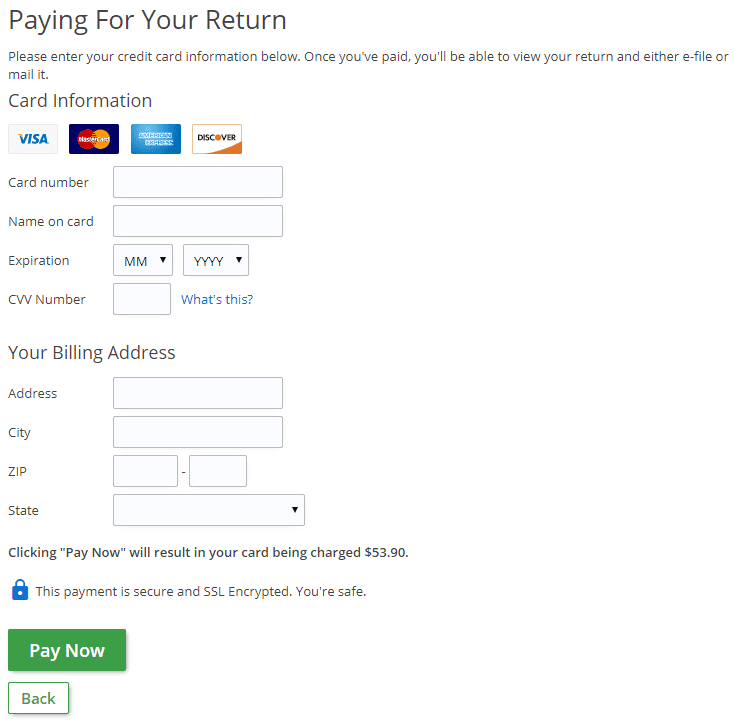
10.1. Enter your credit or debit card information
Enter your credit or debit card information. Make sure that you enter the correct billing and address information before selecting the green "Pay Now" button. Otherwise, your order will not be processed. After four attempts, there will be a 12-hour processing delay.
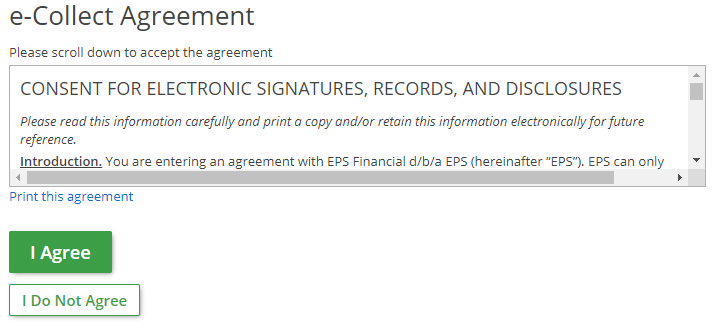
10.2. e-Collect Agreement and Account Information
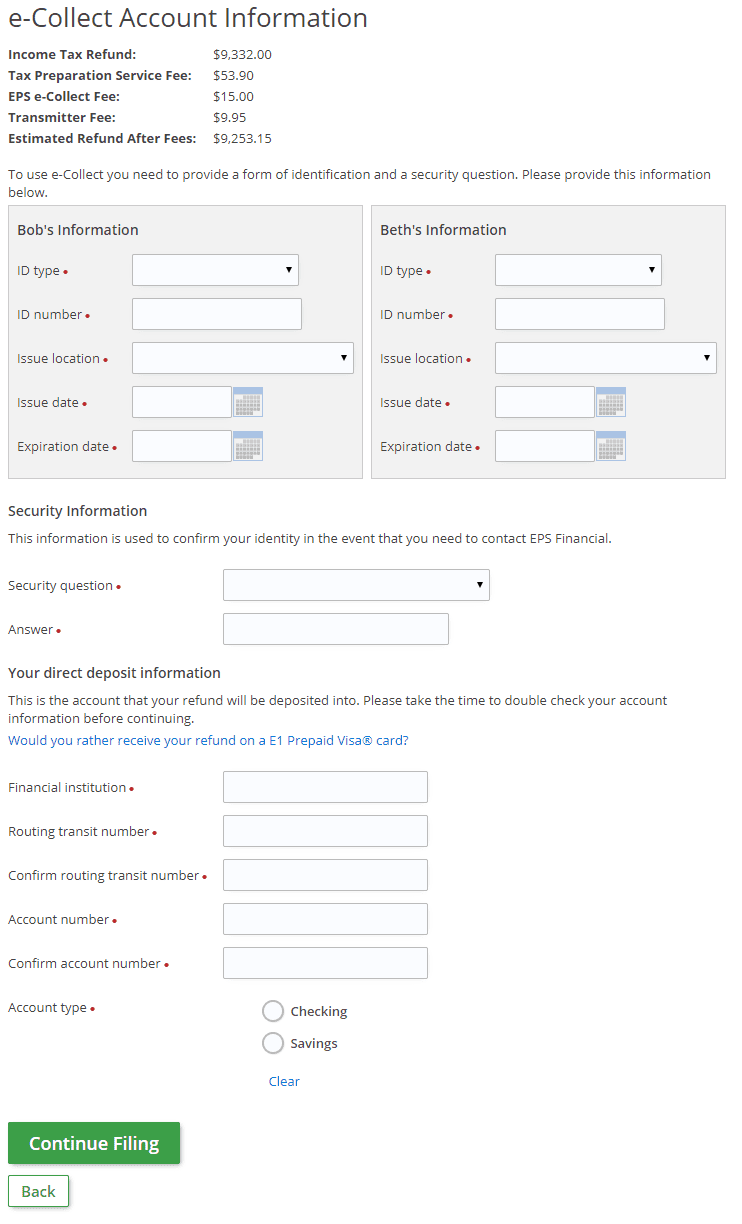
To select the e-Collect payment option (to deduct the fees from your refund), select the green "I Agree" button on the e-Collect Agreement Screen shown below. Note that the banks impose two fees which add up to an additional $24.95, detailed below as well.
Then, enter the requested information shown below and select "Continue Filing".
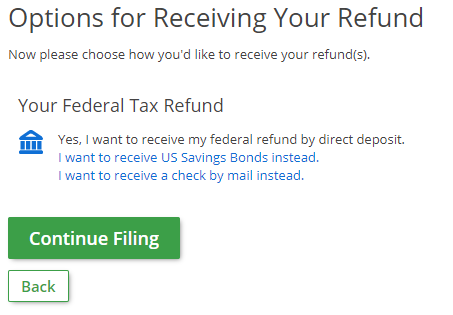
11.1. Options for receiving your refund
Select how you would like to receive your refund, then select "Continue Filing". If you are also filing a state tax return, your state refund options will be listed below the "Your Federal Tax Refund" section as shown on this screen:
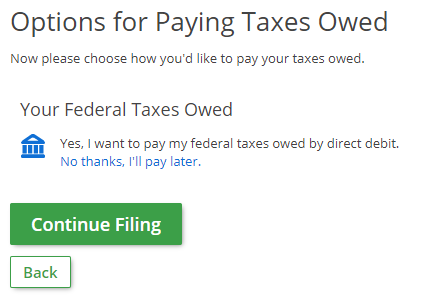
11.2. Select how you would like to pay your taxes owed
Select how you would like to pay your taxes owed, then select "Continue Filing". If you are also filing a state tax return, your state taxes owed options will be listed below the "Your Federal Taxes Owed" section as shown on the screen below. We recommend you pay your IRS taxes directly at the IRS site as you can better track payment. Direct bank payment transfers or ACH is free; there is a processing fee for credit card payments. Visit our guide on how to pay IRS and state taxes.
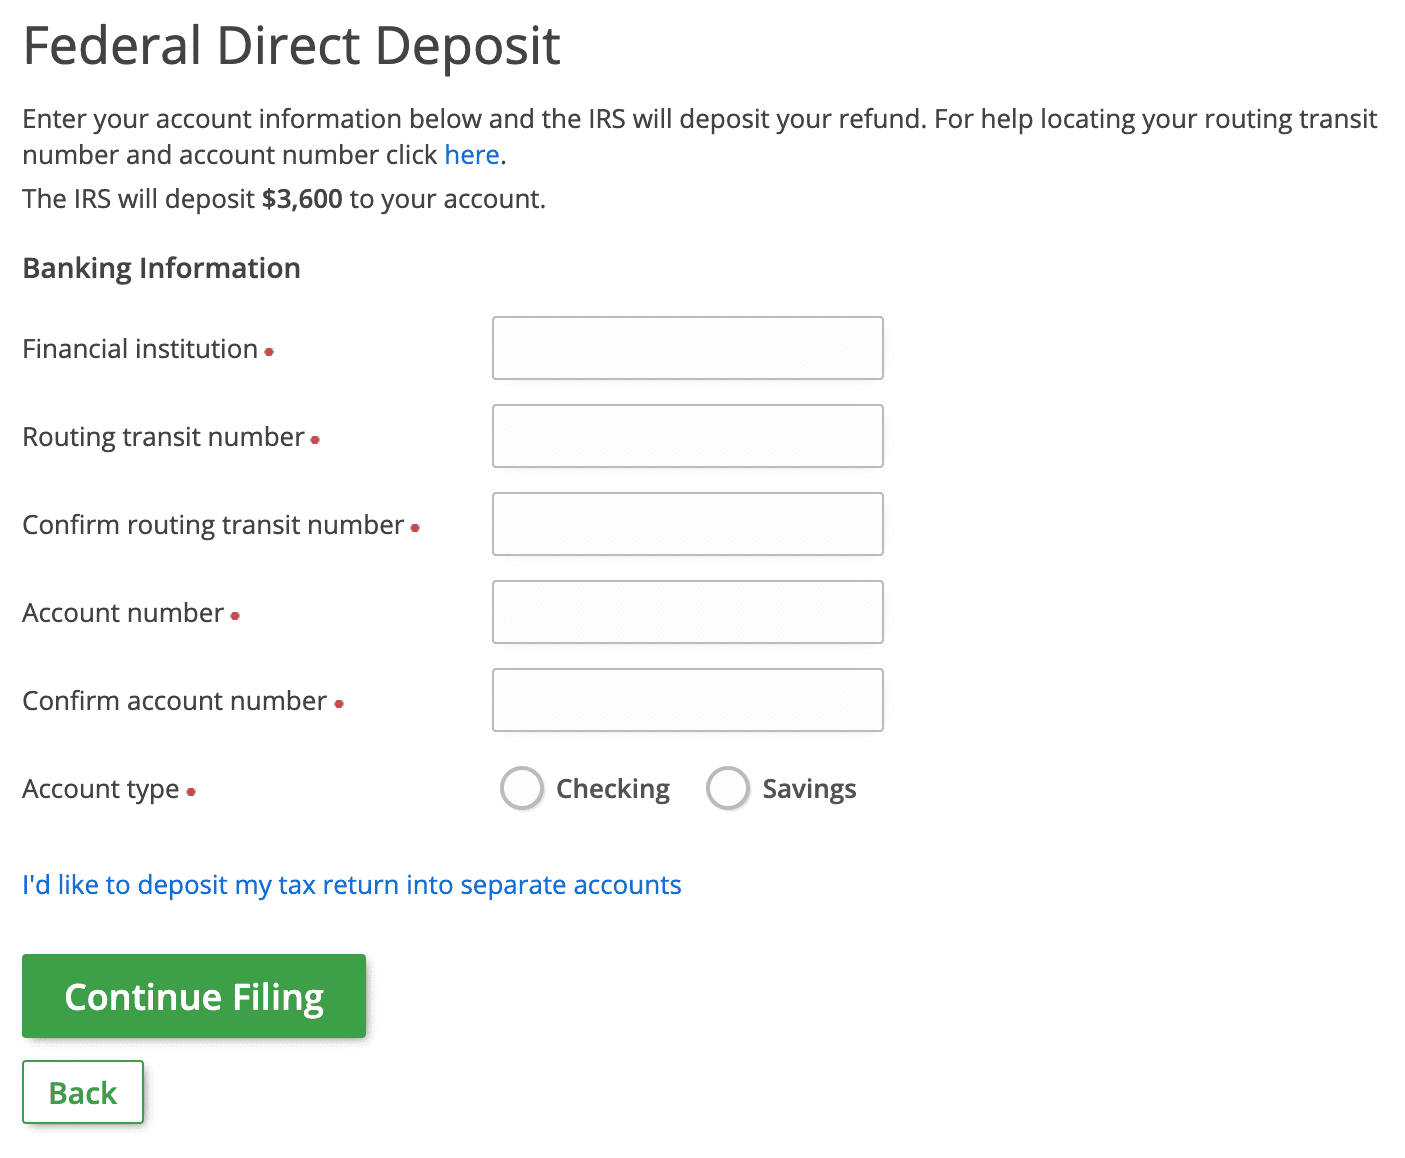
12.1. Enter your federal direct deposit information
Enter your refund direct deposit information for the bank account where you want your refund deposited, then select "Continue Filing". Your name must be on the account. To split your refund deposit up into 2 or 3 accounts, select the "I'd like to deposit my tax return into separate accounts" link. Double check your entries. Once your return has been accepted by the IRS, you will not be able to change the direct deposit information.
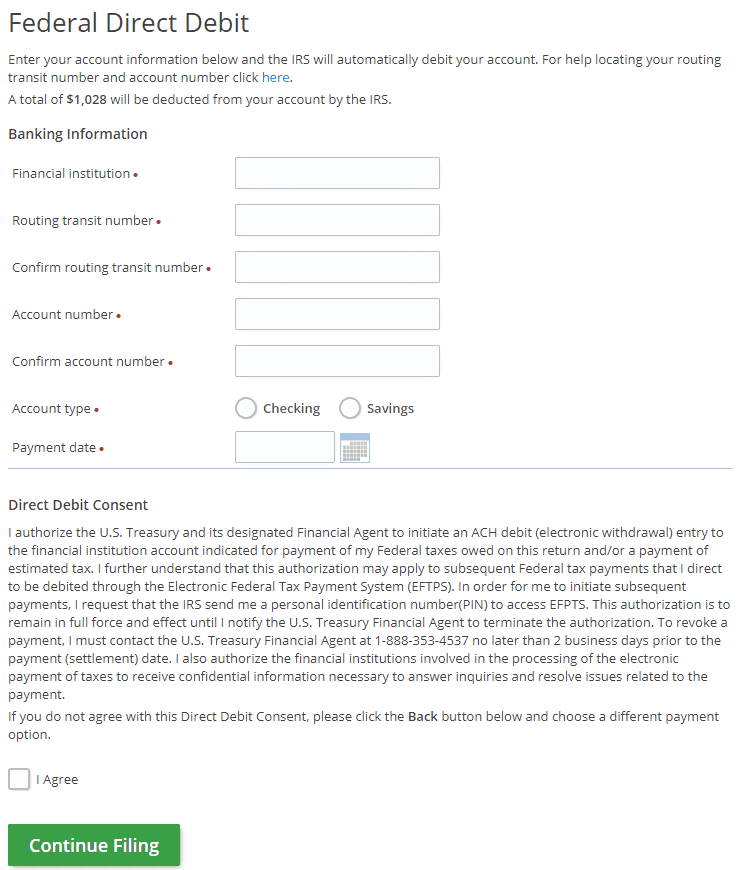
12.2. Enter your federal direct debit information
Enter your taxes owed direct debit information for the bank account where you want your tax payment to be directly debited by the U.S. Treasury. Then, check the "I Agree" box and select "Continue Filing". Double check your entries; once your return has been accepted by the IRS, you will not be able to change the direct debit information.
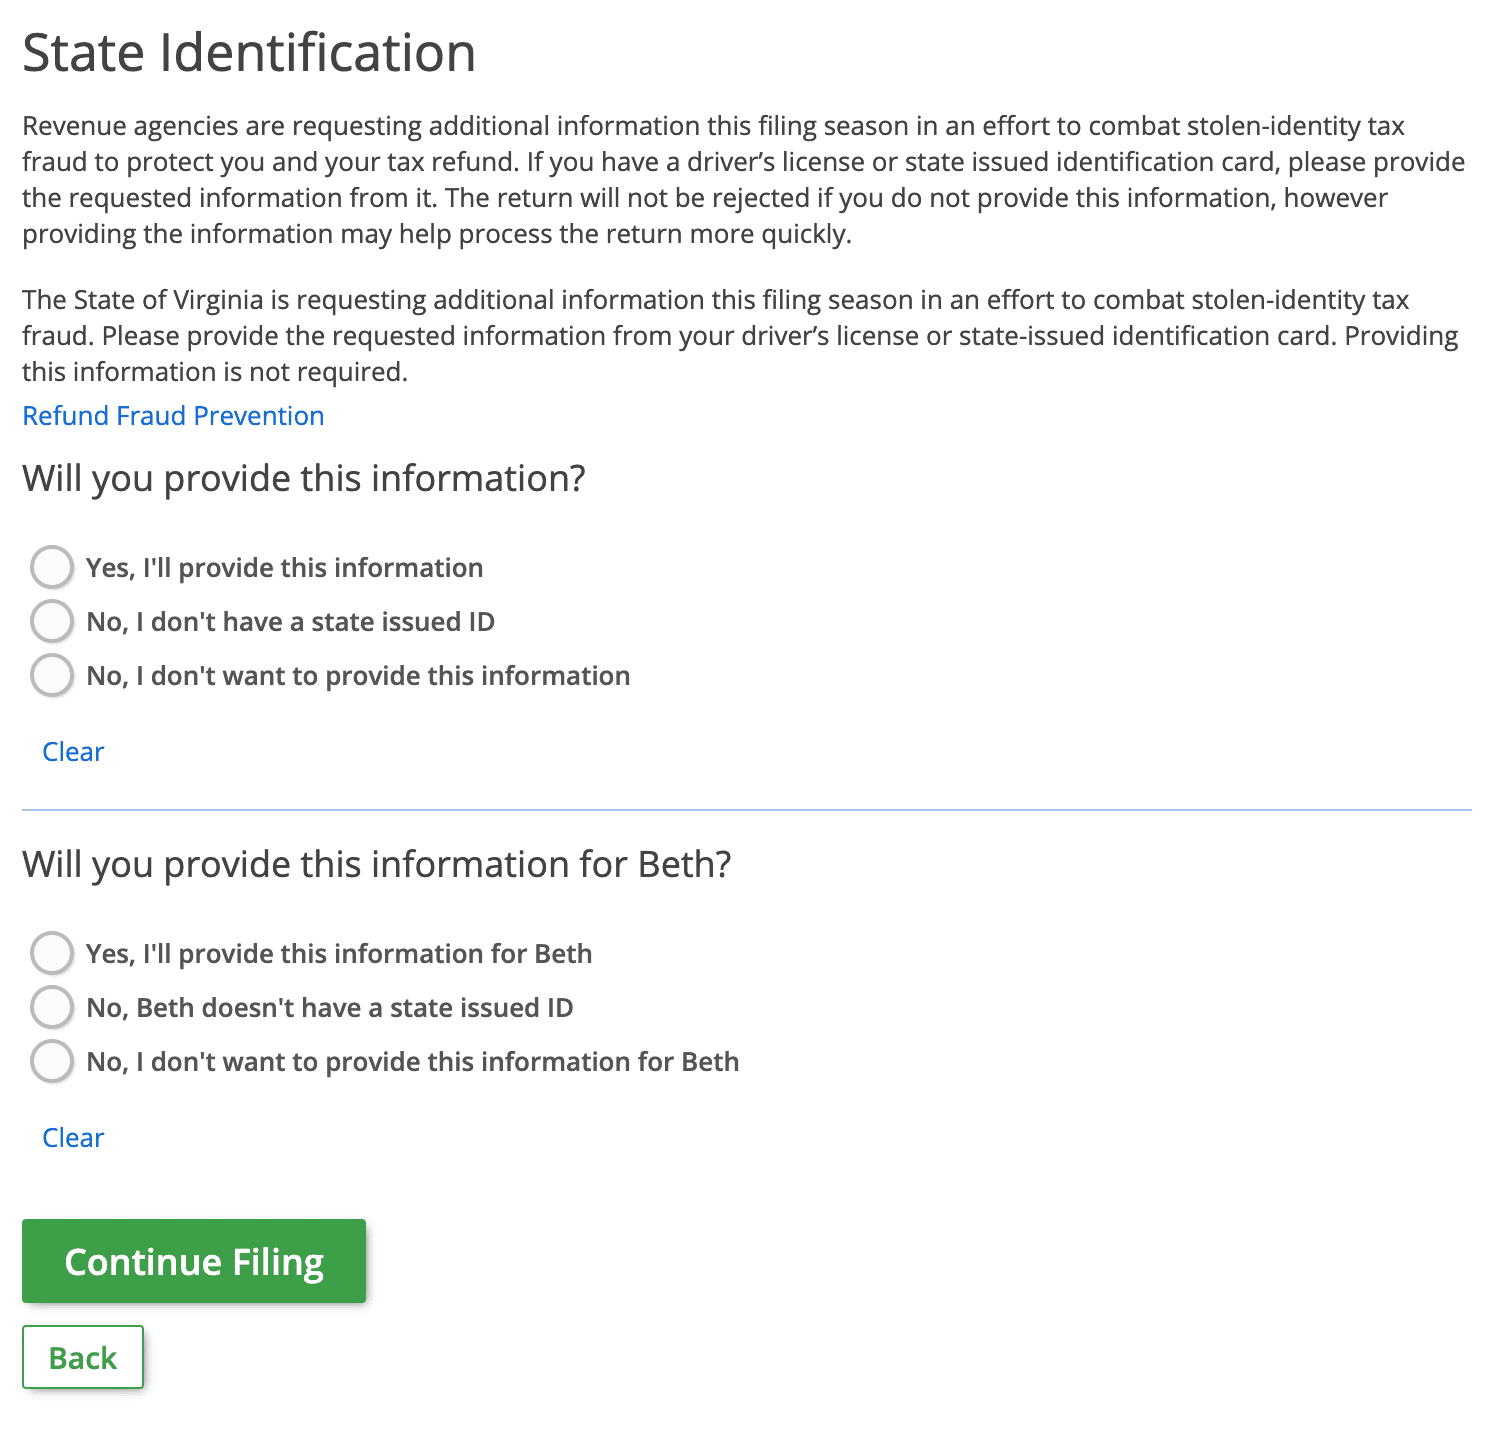
13. Enter state identification details
Provide information to your state to verify your identity online if required by your state, then select "Continue Filing". This is generally not required by most states, but you can elect to add this.
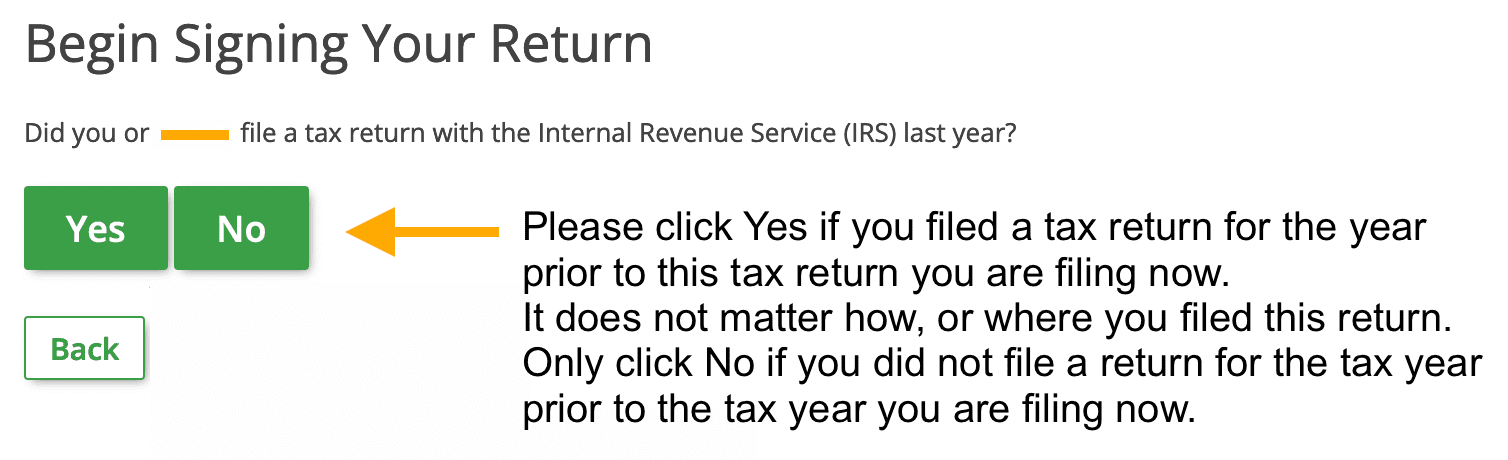
14.1. Verifying your identity online with the IRS
Begin signing your 2024 year tax return by verifying your identity online with the IRS. If you filed or e-filed last year's federal tax return (and/or your spouse if you're married filing jointly) by any method (online, on paper, on another website, or with a tax preparer), then select the green "Yes" button. Continue to Step 15. If you (and/or your spouse if you're married filing jointly) did not file or e-file a federal tax return last year, by any method (online, on paper, on eFile.com, on another website, or with a tax preparer), then select the green "No" button. Skip to Step 16.
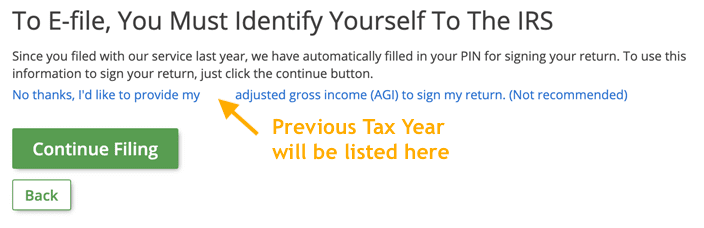
14.2. Select No thanks, I'd like to provide my [tax year] adjusted gross income (AGI) to sign my return.
If you filed or e-filed a federal tax return (and/or your spouse if you're married filing jointly) via eFile.com last year, you are given the option to have our software automatically enter the 5-digit electronic signature PIN that you selected to sign that return. Select the green "Continue Filing" button if you wish to do this and then skip to Step 16. Otherwise, select No thanks, I'd like to provide my [tax year] adjusted gross income (AGI) to sign my return to enter your AGI (Step 15).
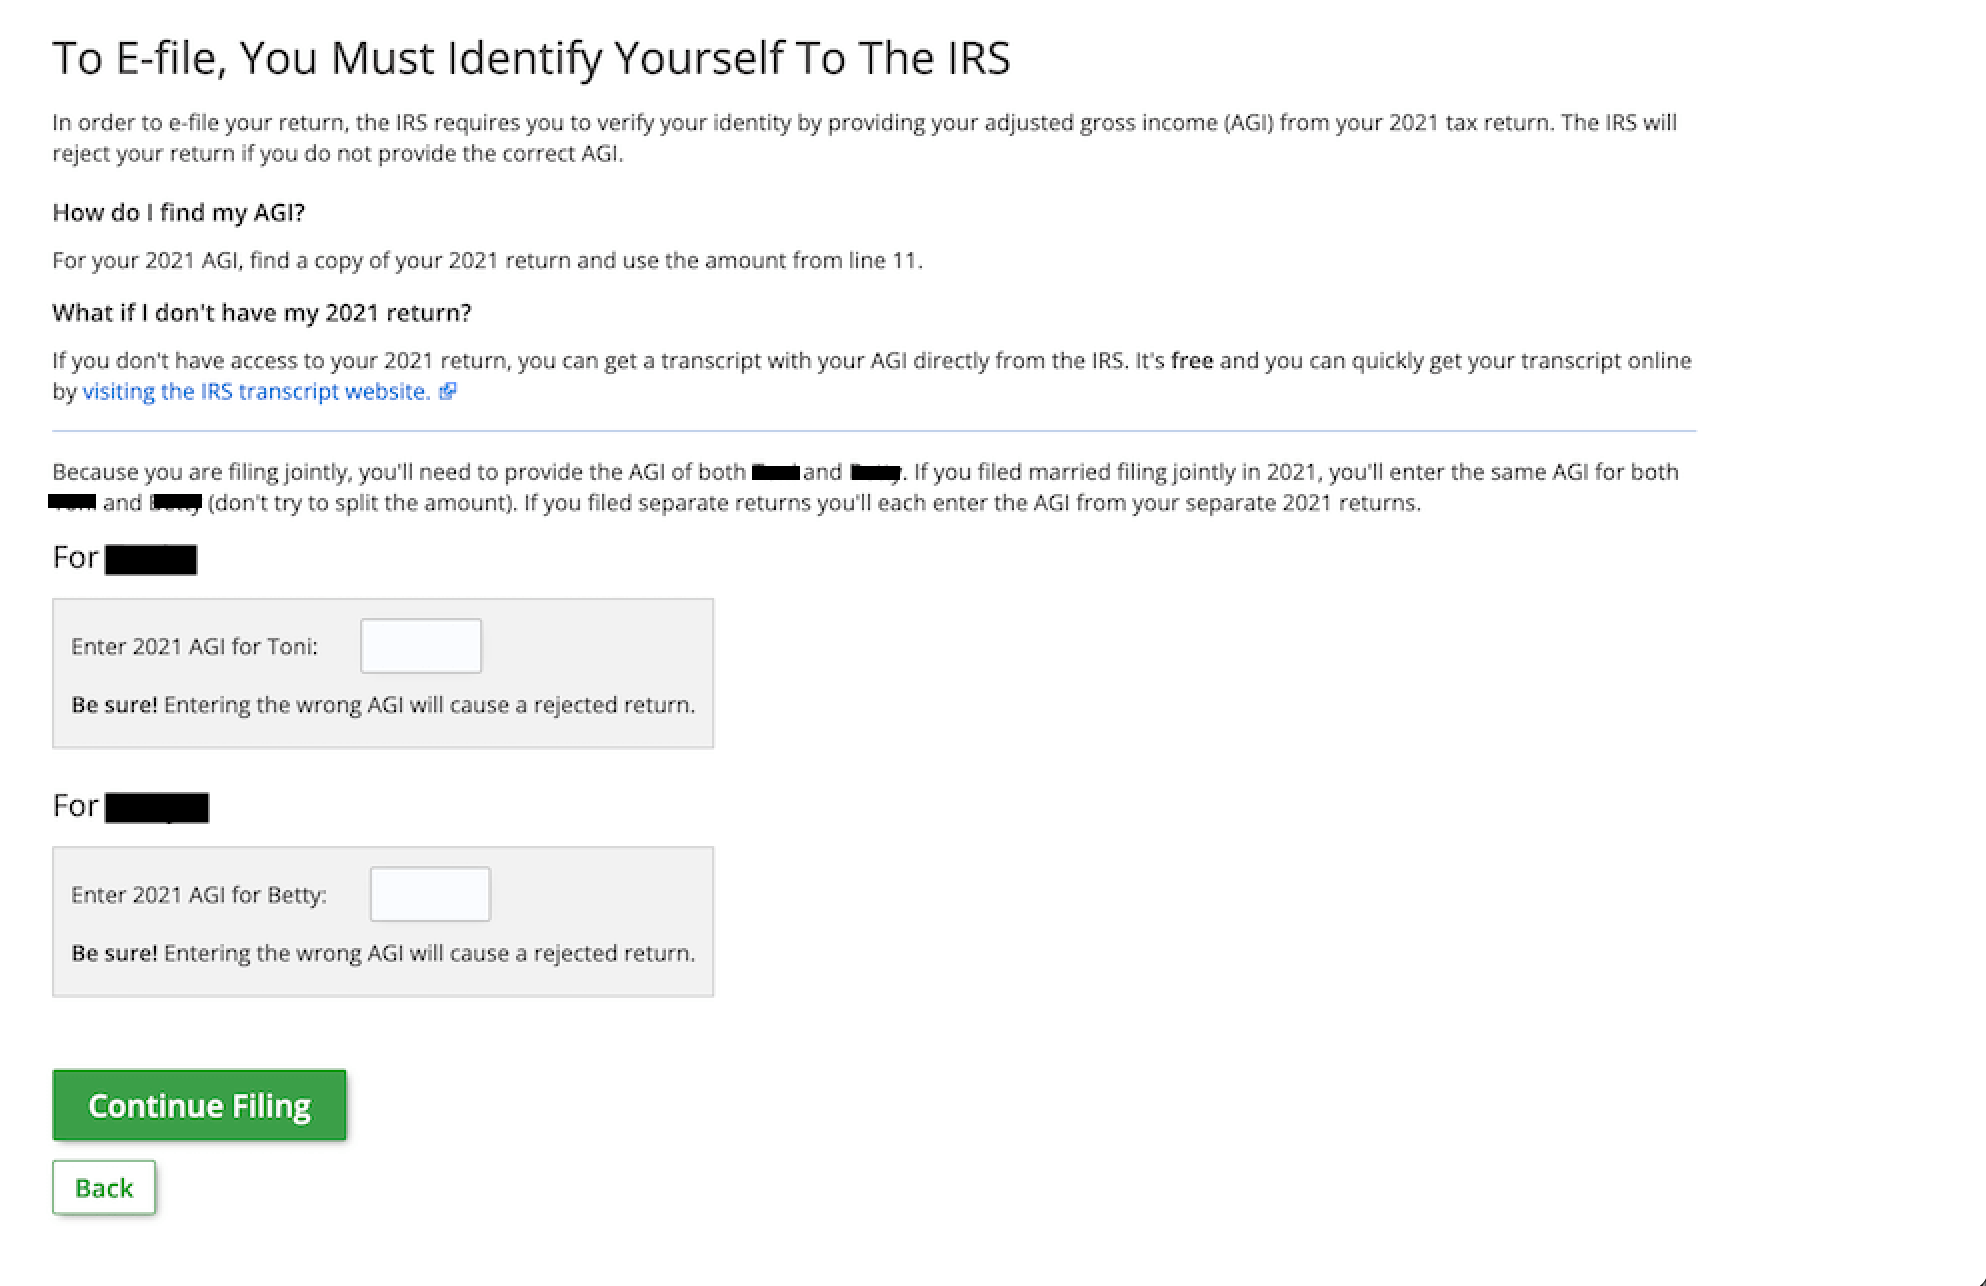
15. Enter last year's AGI details
If you filed or e-filed a tax return last year, enter the AGI for that return in the white box (or boxes if you're married filing jointly) shown below and select "Continue". On the Form 1040, your AGI is on line 11, regardless of if you used Form 1040, 1040-SR, or 1040-NR.
For more AGI help, visit our prior-year AGI page.
16. Enter Identity Protection PIN (IP-PIN)
Answer the question on whether or not you have an Identity Protection PIN (IP-PIN). This 6-digit PIN is assigned by the IRS to victims of attempted identity theft and the number is different from the prior-year AGI you entered to verify your identity with the IRS. If you received an IP-PIN, select "Yes" and continue to Step 17. If you did not receive an IP-PIN, select "No" and skip to Step 18.
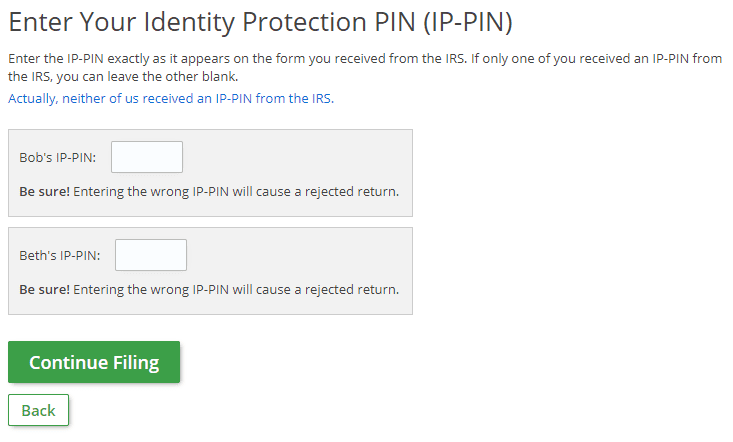
17. Enter IP-PIN in white box
Enter your IP-PIN in the white box (or boxes if you're married filing jointly), then select "Continue Filing".
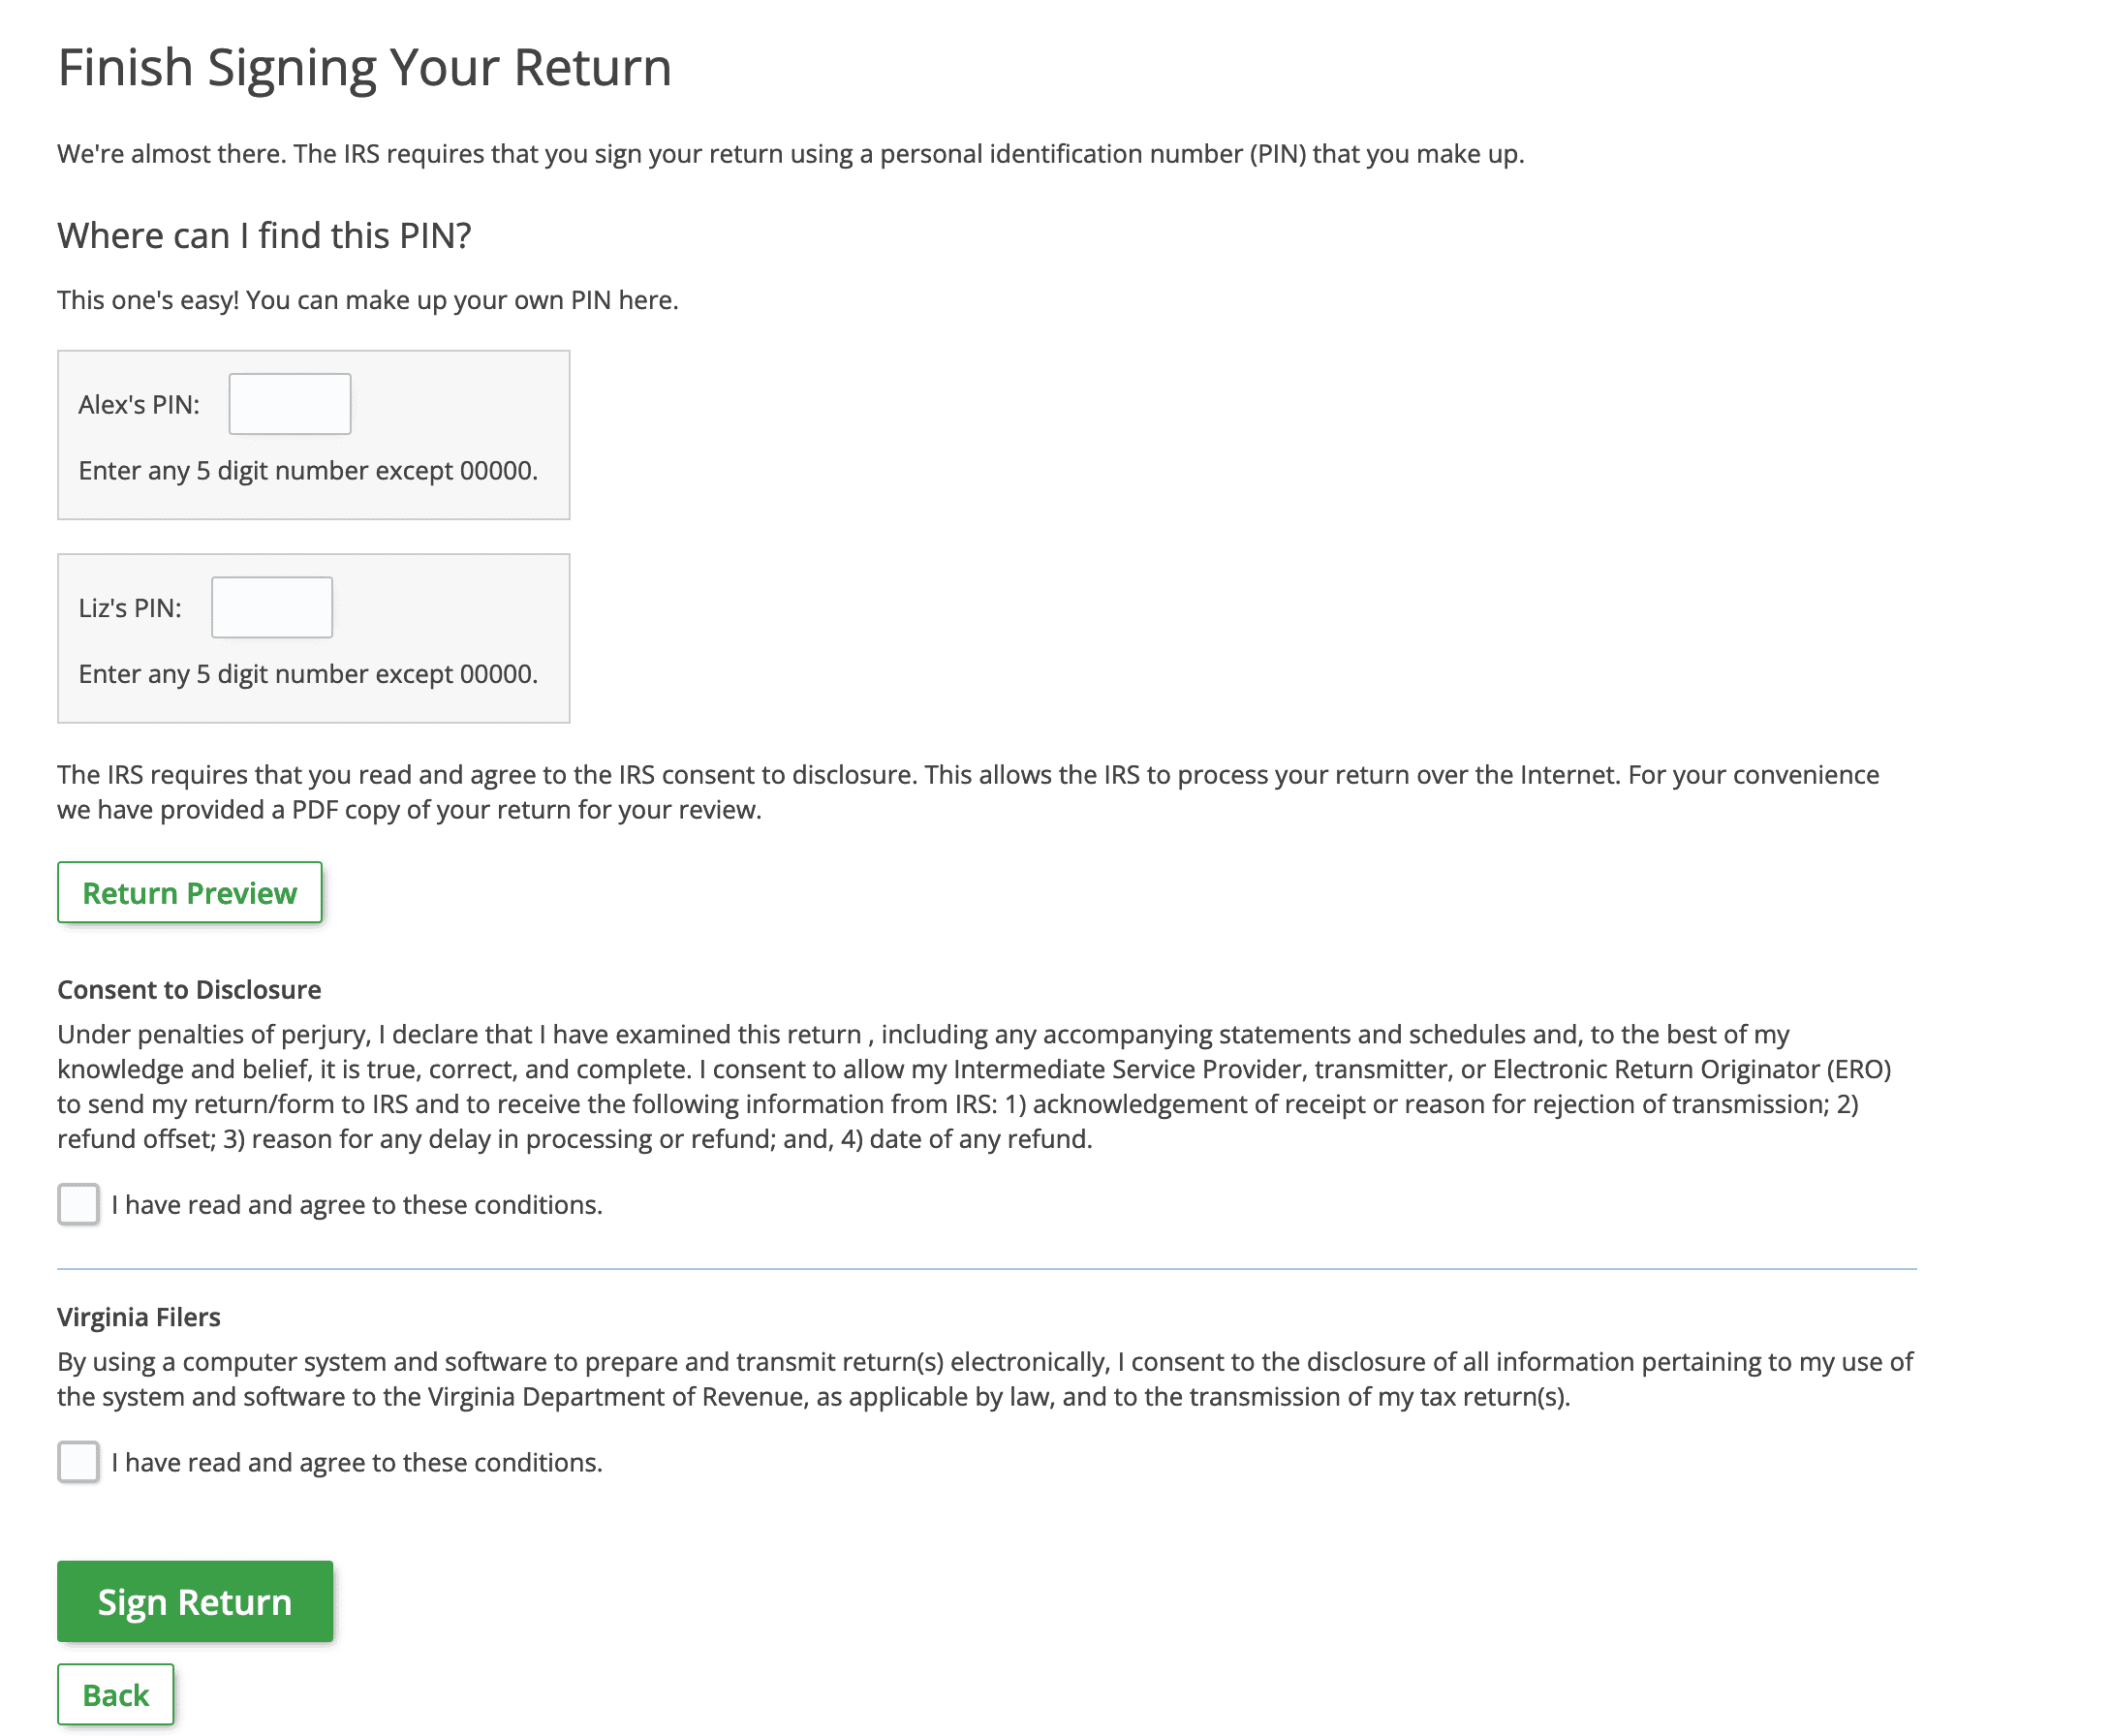
18. Electronically sign your return with a self-selected 5-digit PIN
Electronically sign your return with a self-selected 5-digit PIN. Make up any 5-digit number (except "00000" or "12345") and enter it in the white box. If you're married filing jointly, you'll also need to enter a 5-digit PIN for your spouse. Agree to the Consent to Disclosure by checking the "I have read and agree to these conditions" box and selecting the "Sign Return" button. Once this happens, we will automatically generate a PDF copy of your tax return (which you can find on the "My Account" screen).
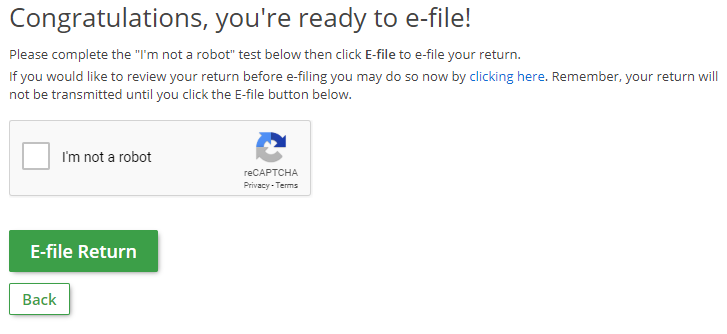
19. Check the "I'm not a robot" box and select the green "E-file Return" button
This is where you actually e-file your return(s). Check the "I'm not a robot" box and select the green "E-file Return" button.
IMPORTANT: Your return(s) will not be e-filed unless you select the "E-file Return" button AND you see the screen in Step 20.
- Note: If the "I'm not a robot" box does not display, check here.
20. Verify your tax return status
Your return has been e-filed! Select "My Return" on the left side of your account screen to see your e-file status anytime. After selecting continue, we recommend you download a copy of your return.
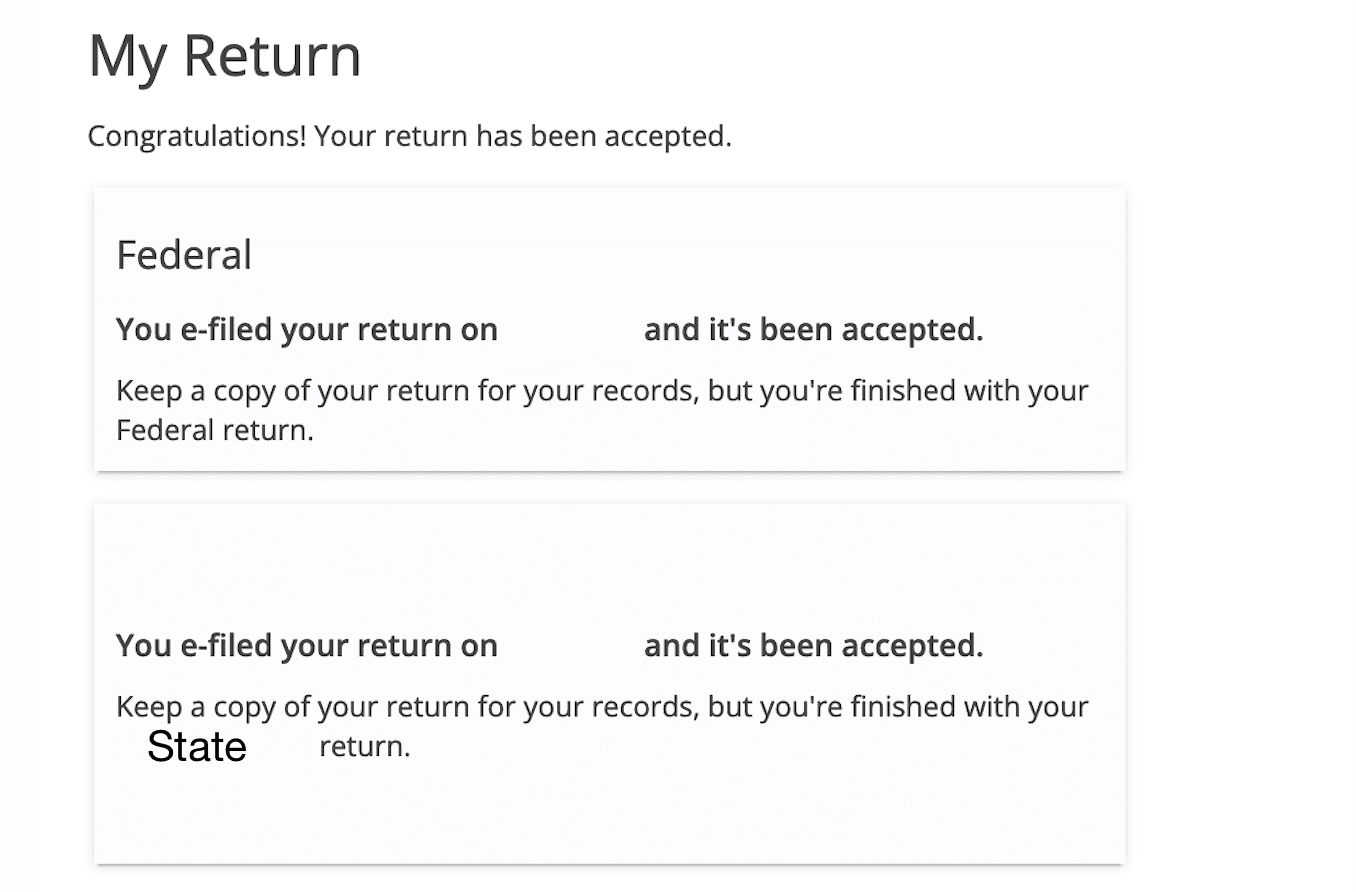
That's it! Your return has been e-filed. You will receive an email when your return is accepted or rejected by the IRS and/or state tax agency. About 24 hours after your return has been accepted by the IRS and/or state tax agency, you can check the status of your refund.